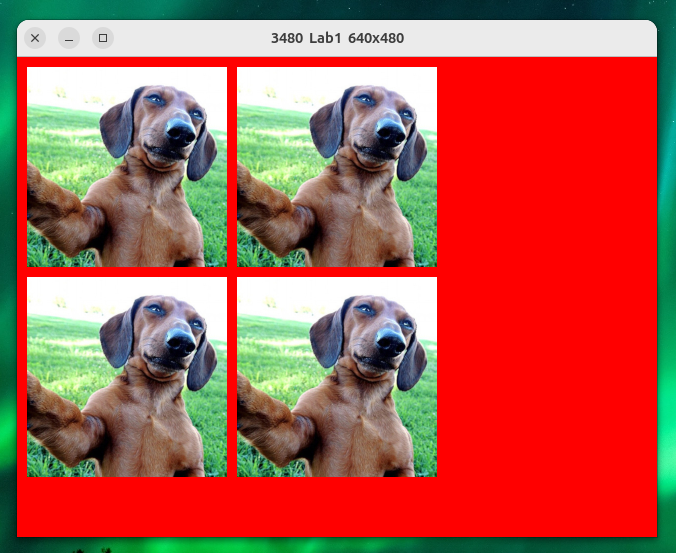
Follow along with your instructor. We will display selfie dog to the screen. Our first goal is to see this...Then put 4 images in place. The same image drawn 4 times.
CMPS-3480 Computer Graphics
Lab-1
Overview:
In this lab, we will:
Please do these steps to prepare for coding...

1. Log into Odin, using the -YC options.
example: ssh -YC myname@odin.cs.csub.edu

2. Run the following script to create your class directory...
/home/fac/gordon/p/3480/build_dirs.sh

3. Run the following script...
/home/fac/gordon/p/3480/lab-start.sh

4. Change to your /3480/1 folder.

5. Copy the lab files now...
cp ~gordon/p/3480/code/1/* .

The asterisk, space, and period are required. "* ."

Compile and run the program:
make
./lab1
Follow along with your instructor. We will display selfie dog to the screen. Our first goal is to see this...
Gray scale image.

Press key 'G' to toggle gray on and off.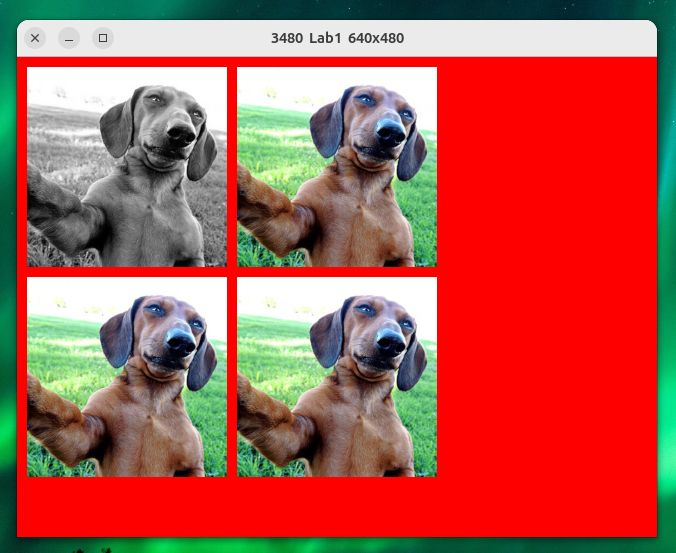
Rotate the images.

The image at lower left will be rotated 90-degrees clockwise.
The image at upper right will be rotated 180-degrees clockwise.
The image at lower right will be rotated 270-degrees clockwise.

Selfie dog is rotating around.

Gordon will help you get the first rotation done.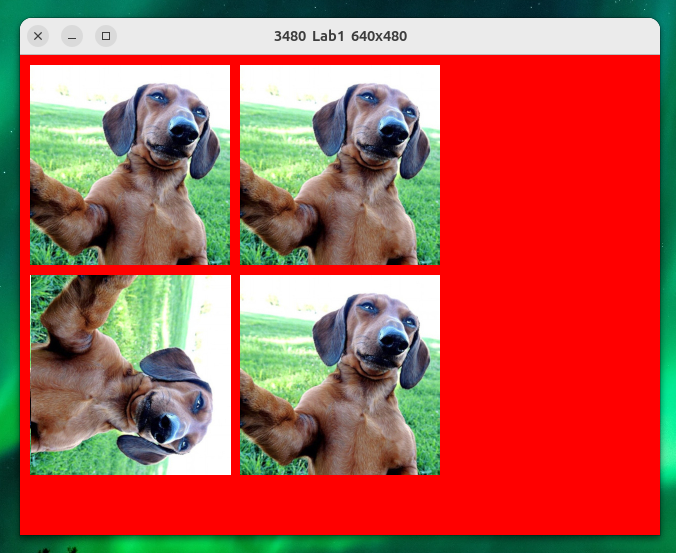
Files to be collected from Odin at end of lab...

   3480/1/Makefile
   3480/1/lab1.cpp
   3480/1/lab1.jpg
Press key 'R' to display a new image and get it rotating.
Here is some source code from class.
The code has been modified after class to accomplish a rotation.
Some "magic numbers" are used in the code to keep the LOC down.
Try to implement the rotation into your program.
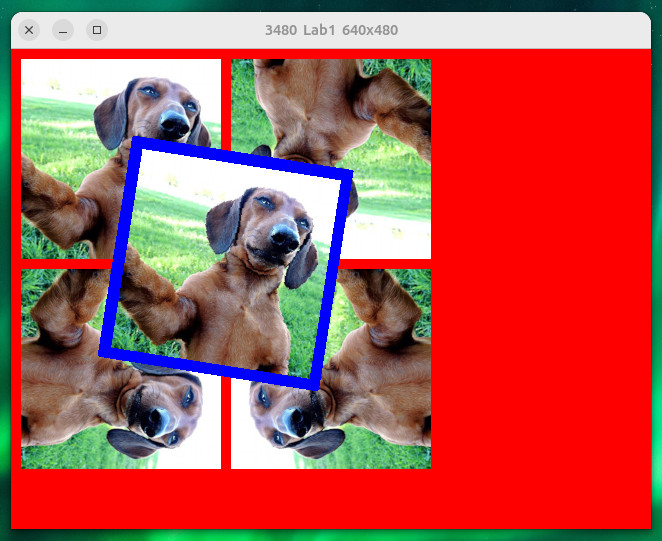
Put the rotated image in the center of the 4 selfie dogs.
//rotated selfie dog...
//This code will produce one dog image as seen below.
//The code is from class, but modified some.
int cx = img.width / 2;
int cy = img.height / 2;
unsigned int colorref = 0;
//Build the rotation matrix before the loop.
double mat[2][2];
double angle = 50.0; //degrees
double radians = (angle / 360.0) * (3.14159265 * 2.0);
mat[0][0] = cos(radians);
mat[0][1] = -sin(radians);
mat[1][0] = sin(radians);
mat[1][1] = cos(radians);
p = img.data;
//scan an area with width same as diagonal width of image
for (int i=-42; i<img.height+42; ++i) {
for (int j=-42; j<img.width+42; ++j) {
double x = j - cx;
double y = i - cy;
// <x,y> is the vector
double rx = x * mat[0][0] + y * mat[0][1];
double ry = x * mat[1][0] + y * mat[1][1];
// <rx,ry> is the rotated vector.
rx = rx + cx;
ry = ry + cy;
int irx = rx;
int iry = ry;
if (irx >= 0 && irx < img.width &&
iry >= 0 && iry < img.height) {
int offset = iry * img.width * 3 + irx * 3;
p = img.data + offset;
colorref = *(p+0)*65536 + *(p+1)*256 + *(p+3);
x11.setForegroundColor(colorref);
x11.drawPoint(10+img.width+52+j, 10+img.height+10+i);
}
}
}
The code above produces the rotated image below.
The color of selfie dog is not perfect. See if you can fix that.
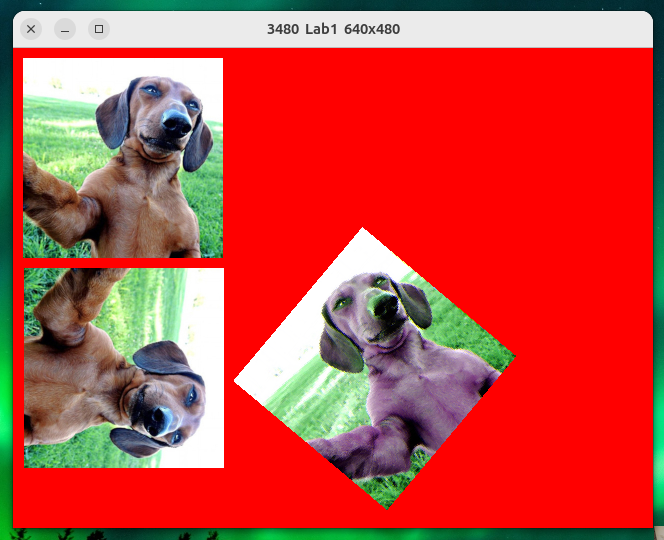 The finished lab should look something like the image below.
A border is not required.
Do not rotate the center image at 90-degree intervals.
Rotate at a small interval such as 3-degrees at a time, or even 1-degree.
The finished lab should look something like the image below.
A border is not required.
Do not rotate the center image at 90-degree intervals.
Rotate at a small interval such as 3-degrees at a time, or even 1-degree.